Once you have created a member list, you are all set to create and send marketing emails. You just need to follow the below mentioned steps:-
Create Marketing Email
In order to create a marketing email follow the steps below :-
Click Marketing Automation tab from the menu on the left-hand side.
Then click on Bulk Activities to select SMS or the email activity that you need to perform.
Click Email Marketing Campaigns option.

There will be 4 steps to setup an marketing email.
- Setup:-
Name - It is a mandatory field.
Description – You can add a description for the email. It will not be part of email content.
From Name – This name will be visible to recipients of the email.
From Email – This email will be visible to recipients of the email.
Sell do Tracking -
Campaign - You need to select campaign for which the emails will be tracked. The campaigns from your sell.do CRM account will be listed here. If you need to create a new campaign, the link to setup new campaign is also provided, which will navigate you to CRM.
Reply To Email Address – Once you select campaign, reply to email address need to be selected. Please note that the reply from the lead will be sent to sell.Do CRM and contents of reply email will be shown on activity feed of lead. Input Channel generated in Sell.Do – You need to select the input channel for which you need to track the input channel.
Enable Google Analytics Integration – You can also track the emails via Google Analytics, for which you need to provide following details
UTM campaign – It is a mandatory field.
UTM source - It is a mandatory field.
UTM Medium - It is a mandatory field.
Click Proceed for the next step.
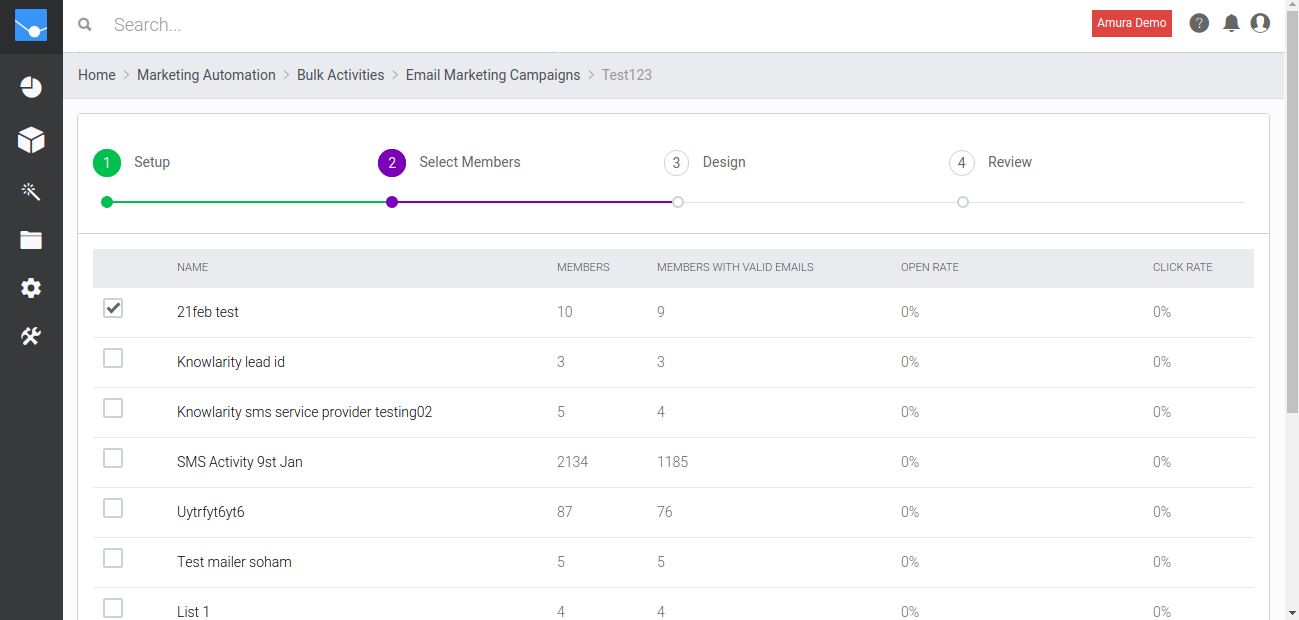
- Select Member List
You can select the member list from all saved lists displayed. Along with member list name, a number of members, members with valid emails, open rate and click rate are displayed.
You can create new member list, from the Create new member list link.
Select the member list from the list on which the emailer is to be sent.
Click Proceed to go to next step. You can also save the email details and exit by Save and Exit option, and come again to edit the details.
- Design:-
Subject – It will appear in the subject line of the email.
Email Body - You can generate email body by 3 ways
Use your HTML code – You just need to paste your HTML code here which will be used as email body. You can use different custom variables in the email body. Providing unsubscribe link in the email body is mandatory.
Simple Email Editor – Using this editor, you can create a simple email body. You can use different custom variables in the email body. Providing unsubscribe link in the email body is mandatory.
Click Proceed to go to next step. You can also save this email details and exit by Save and Exit option, and come again to edit the details.

- Review:-
Once you have completed 3 steps, you will be able to review all configuration and complete last step here including
Member Lists – It will show selected member lists with a number of members and number of email addresses in each list.
Email Preview - It will display all the email contents which give an idea how it will appear to the customer.
Send Test Email – You can test the email by sending it to some test email addresses.
Send/Save – At the final stage, you can now decide if you want to save this email or send later or send now.
Send Now: Selecting this option, will allow you to send the marketing email immediately.
Schedule: Selecting this option, will allow you to send the marketing email on scheduled time. For this, you need to select a date, time and timezone.
Save as Draft: Selecting this option, will allow you to save this marketing email as a draft. Later you can modify and send it when you wish to.
Click Finish to save and submit the details.
